Sarkarai Pongal (Sweetened Rice)


Image

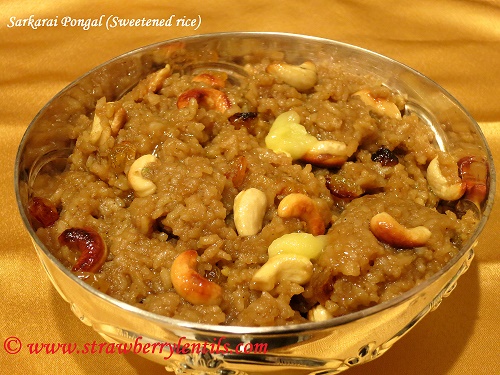
We celebrated pongal (the harvest festival) a week back. Leisurely posting the recipe a week later, that is how “fast” I am. Well, next year I can republish this post right on time, so I am happy for next year ;). Sarkarai Pongal is a very traditional, very basic and a very simple dessert, often offered in temples or made in homes on auspicious days. But don’t let that restrict you, this makes a great dessert for any day or any party. Another popular variation of this dish is “Akkara Vadisal” where rice is cooked in milk instead of water.

Making this sweet pongal involves only four basic steps. Cook rice, make brown sugar syrup, mix rice and syrup, add some roasted nuts and raisins. Child’s play , right ? It is really that simple. Hopefully, the tips I give below are helpful in simplifying the already simple recipe.

To make the sweet pongal, you will need :

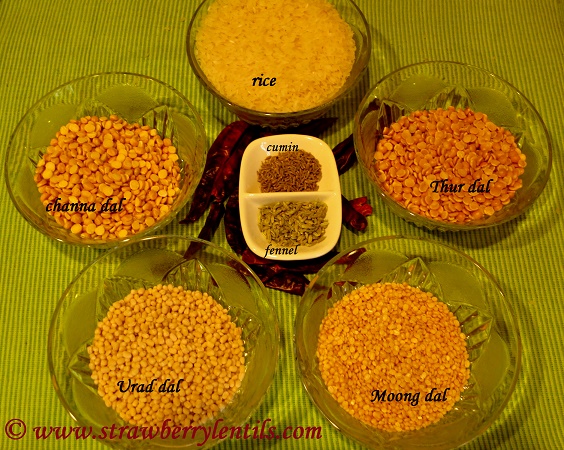
  1. Uncooked rice – 1 cup (any kind is good)
  2. Moong Dal or split green gram – 1/4 cup
  3. Jaggery/Vellam/Dark Brown sugar – 1 cup
  4. Water (to cook rice) – 4 cups
  5. Water (for syrup – 1/4 cup)
  6. Cardamom powder – 4 tsp
  7. Cashew nuts – 3 tbsp
  8. Raisins – 2 tbsp
  9. Ghee / Melted Butter – 4 tbsp
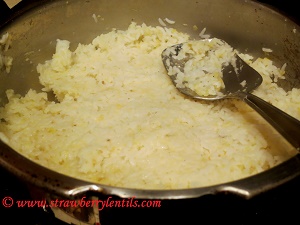
  • First, we have to get the rice ready. In a pan or a pressure cooker, heat 2 tbsp of ghee or butter and roast the moong dal (green gram).

Image

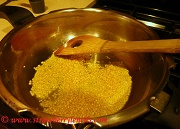
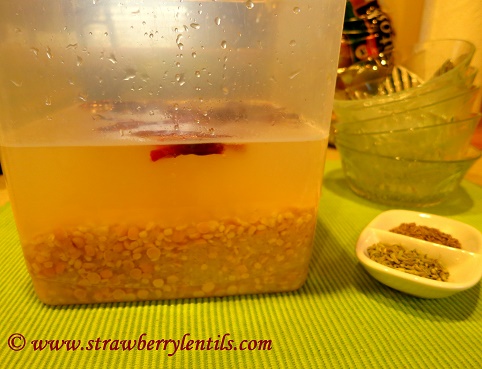
  • Rinse rice and add  rice to the pan and mix well that each grain is coated with ghee.

Image

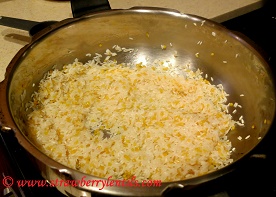
  • Rice and dal mixture has to be well cooked to really soft consistency, so double up the quantity of water used. Add 4 cups of water and 2 tsp of cardamom powder and cook the rice and dal until soft. When rice is cooked , mash it gently with the back of a spatula. (If not using pressure cooker, you will have to add more water).

ImageImage

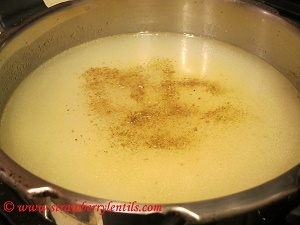
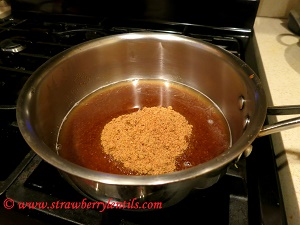
  • Now to make the brown sugar syrup, mix 1 cup of brown sugar in 1/4 cup of water and heat until the sugar completely dissolves in water.

ImageImage

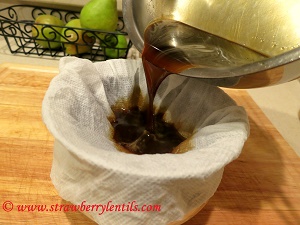
  • If you are using jaggery/vellam it is important to make sure the syrup is free of any impurities, so filter the sugar solution using a clean cloth. I used a wet bounty paper towel, it gets the job done.

ImageImage

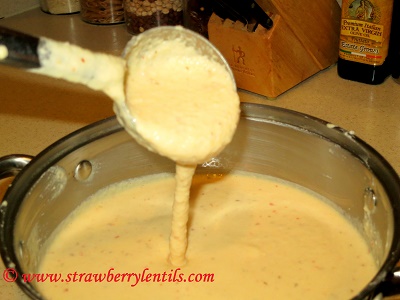
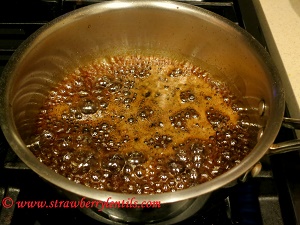
  • Now, put the clean syrup back on heat and bring it to a boil. You are looking for 1-string consistency, but when your syrup comes to a good rolling boil, you can be sure its there.

Image

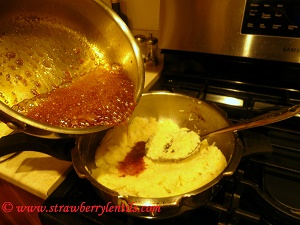
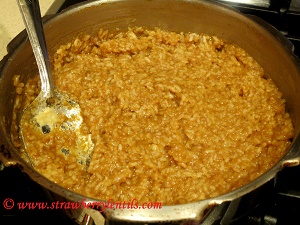
  • Add the syrup to the cooked rice and dal and mix thoroughly.

ImageImage

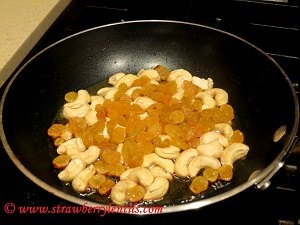
  • Now , for the last step : In a separate pan , add a tbsp of ghee/butter , and fry the cashews and raisins to golden brown and add to the rice.

ImageImage

Add the last spoon of ghee right before serving, and your sweet pongal is ready to be served to the king/queen in you 🙂

Some pointers :

  • Instead of making syrup, you can directly add the  brown sugar to rice. But I do not prefer that method, as the brown sugar tastes raw in the final pongal. Adding the syrup gives a well rounded taste.
  • I have only used cardamom powder, you can also add nutmeg, ground cinnamom or a pinch of ground ginger to elevate the flavors.
  • It is not very appealing when it is in a soupy consistency, often confusing the eater if its pongal or payasam (kheer). It should be in the”sticky rice” consistency.
  • Use milk to cook the rice instead of water and make a much creamier version of this pongal, which is also called as “Akkara Vadisal”.

Treat yourself to this yumminess effortless !!!!!!

Image

Baked Tofu Fries


Image

There is nothing much to say about this recipe, actually there is nothing much to this recipe either :).  My kids love fries and they also love tofu. I have seen tofu responding very well to baking. So this recipe was a no-brainer, crunchy fries (just the way  they want it) made with less than a tbsp of oil (just the way I like it 🙂 ).

To make this healthy munch, you will need :

1. Extra firm organic tofu (I used half the slab for this recipe)

2. Chilli powder or paprika – 1 tsp

3. Garlic Paste or Garlic powder – 1 tsp

4. Salt to taste

5. Oil – 1/2 tbsp

  • First cut the tofu into strips. If you prefer super crunchy fries, cut them very thin. I prefer crunchy on the outside and soft on the inside kind, so I did medium cuts.

Image

  • For the rub, I mixed red chilli powder, garlic paste, salt and oil. You can also grind red chillies and garlic cloves to make a fresh rub or use the store bought chilli garlic paste.

Image

  • Rub the chilli garlic mix on the tofu strips gently. Even the extra firm tofu breaks easily, so be gentle :).  Line a baking tray with foil or grease the tray with cooking spray and place the tofu strips on the tray in a single layer. Bake at 425 degrees for about 12 minutes and then flip the strips and bake for another 8 – 10 minutes , until your preferred texture is reached.

Image

  • As I expected the golden crunchy fries were gone in minutes and the kids were complaining that I didn’t make enough :). Well, there is always next time :).

Image

Adai (Savory Lentil Pancakes)


I am beginning this post with an apology to Sugarfree Sweetheart Priya , because this recipe was intended to be part of the diabetic friendly food week she hosted, but did not make it in time :(. It was one of those weeks, where everything seemed calm and quiet until things started rolling and before you knew, it was an avalanche and you are buried deep under trying to catch a breath. It was frustrating to have all the photos in the camera, yet not able to find an hour to sort through them and post the recipe online. However, it was a happy avalanche , had my college buddy over for thanksgiving, and met two other college mates over the weekend and it was an unplanned and unintended mini college reunion, which is always fun.

Even though I didn’t post in time, the recipe is still a very diabetic friendly food and I just love it for its taste. I also have a weird personal connection with this “Adai”. In May 2002, suddenly I started craving Adai, so I kept  making them two or three times a week, and two weeks later I found out that I was pregnant with my first child. And in July 2005, when I started super-craving Adai again, I just ran to the store and got an early pregnancy kit and guess what , I was pregnant with my second child. Pregnancies and the cravings…….. 🙂   No  more crazy cravings…… and thank God for that !

So here is my Adai recipe for the Sugarfree Sweetheart’s Diabetic friendly food week:

Image

To make the adai batter , you will need :

  1. Rice – 1 cup (use brown rice instead)
  2. Thur dal (split piegeon peas) – 1/2 cup
  3. Channa dal (split chick peas) –  1/2 cup
  4. Moong Dal (green gram) – 1/2 cup
  5. Urad Dal (black gram) – 1/2 cup
  6. fennel – 1 tsp
  7. cumin – 2 tsp
  8. dried red chillies – 2 or 3 (5 or 6 for spicier adais)

Image

  • Soak the rice and lentils in water for 3 hours. I also soak the red chilles with them as it helps them to grind better.

Image

  • After 3 hours, grind the soaked rice and lentils with red chillies, cumin, fennel and salt to make a coarse batter. I grind in my blender and it takes only two minutes.

Image

  • You can make pancakes with just plain batter. But adding onions and greens add more texture and taste to the adais. Traditionally, drumstick leaves are used. They are not available here, so I use spinach.

Image

  • Thinly slice an onion and chop  baby spinach and add to the the batter.

Image

  • Heat a skillet and grease with cooking spray. Pour a spoonful of batter and spread evenly.

Image

  • When you see the adai browning slightly, flip over and cook the other side.

Image

  • Flip one more time and cook until you see brown spots. The lentil batter takes longer to cook.

Image

Adais can be served with coconut chutney or a dollop of yogurt. If you ask me, they are good on their own :).

Image

Banana Blossom curry (Vaazhaipoo curry)


The banana tree is a true giver, all parts of the plant : the tender bark, the leaves, the flowers , the fruits…. either are edible or they aid in cooking. Banana blossoms, rich in antioxidants , flavonoids and vitamin E are found to stabilize blood sugar levels and elevate mood among other health benefits. Prepping the flower for cooking can be cumbersome, but its unique taste is completely worthy of the time and efforts.

Image

If you are new to cooking with the blossom, this post can show you how to properly prep the flower. The blossom can be used in stir fries, salads, stews and curries. The most popular concoction is the “vazhaipoo vadai” (crispy patties made with chickpeas and the banana flowers). Though the flowers can be used in any curry, here I have given my mushroom curry recipe, replacing mushrooms with the banana flowers.

Without further ado, here is how to prep the blossom for cooking :

[Either use  food prep gloves or rub sesame oil on your fingers before working with the blossom to avoid staining.]

  • The petals are layered on top of one another and as you remove each petal you will find the cluster of tiny flowers inside.

Image

  • Actually in a fresh banana blossom , the flowers are slightly pinkish (as shown in the image below). However, the blossoms I get here are either refrigerated or frozen before they make it to the stores, so the black color. However, the color doesn’t affect the taste.

Image

[Image from : http://www.moorheadandrutter.com.au]

  • As you remove the layers you will notice the flowers getting smaller and tender.

Image

  • Finally you will end up with this beautiful tender bud, which can be either eaten  raw or sliced up and used in cooking.

Image

  • Once you have removed all the flowers, each flower must be individually prepped by removing some unwanted parts (similar to deveining a shrimp).

Image

  • Each mature flower has  a stamen and a sepal (a wax paper like layer). It is important to remove both , as the stamen and sepal will stay raw even after cooking, resulting in an unpleasant texture and taste.

Image

Image

  • It is time consuming but if it is any consolation, only the outer 4 or 5 clusters will have stamen and sepal. The middle clusters won’t have a prominent sepal. The inner flowers are very tender and they can be used as such.

Image

  • Soak the cleaned flowers in diluted buttermilk until you need them.

Image

This concludes the prepping of the banana blossom. No matter what you choose to make with them, the above steps have to be done first.

Now for the curry recipe :

I normally make this curry with mushrooms. The cooked flowers have a similar texture to mushroom, so I figured this would be a good choice. You can add the florets in any curry of your choice.

To make the cooking sauce for this curry, you will need :

Image

  1. Pearl Onions – 5 or 6
  2. Ginger – 1 inch piece
  3. Garlic – 4 or 5 cloves
  4. Green chilli – 1 (optional)
  5. Dry red chiilies – 3 or 4 (use red pepper flakes instead)[use only 1 or 2 chillies for milder curry]
  6. cloves – 3
  7. cardamom – 1
  8. fennel – 1 tsp
  9. cumin – 1 tsp
  10. coriander seeds (dhaniya) – 1 tsp
  11. roasted gram dhal (pottukadalai) – 1 tbsp (replace with cashews or grated coconut)

I know thats a lot of ingredients, but they result in a very aromatic curry. No fancy ingredients anyways 🙂 . Grind all the above ingredients with little water to make the cooking sauce.

Image

  • You will also need :
  1. onions – 1 medium (chopped)
  2. tomatoes – 1 large or 2 medium (diced)
  3. curry leaves – few
  4. turmeric powder – 1 tsp

Image

  • In a pan , heat a 2 tsp of oil, and saute the onions and curry leaves. Then add the tomatoes and cook until tomatoes soften.

Image

  • Add the banana flowers (that were soaking in buttermilk) to the pan and saute.

Image

  • Add the cooking sauce , turmeric powder, salt and mix well.

Image

  • Add about half a cup of water and cook until the flowers are tender and oil starts to separate. It will take about 15 – 20 minutes in medium heat.

Image

I like this curry for its flavors and also that it goes well with rice, rotis, idli and dosa. You will definitely appreciate the unique taste of banana flowers in this curry. Hope you try it 🙂 !

Garlic Bread (with Indianised garlic butter)


The perk of home cooking is customizing recipes to suit our own taste buds. There are countless times, I had eaten something outside wondering “hmmm….if it just had a hint of chillies” . That too , when you try something from a different cuisine and wondering how it would taste with a sprinkle of chaat masala or garam masala, there is only one option “DIY” :). I lovvvvveee garic bread (who doesn’t ?)….the golden toasted crust with half crisp and half soft insides soaked in garlic…..I so wish, its  health food 😦 . Every time I ate garlic bread, I sprinkled some crushed red peppers on the slices, and I  believe that red chillies and garlic compliment each other so well. So when I had this intense craving to taste garlic bread spiced up with red chiili powder and garam masala, I knew I had to make it :).

I am not baking any breads yet (I might soon give it a try 🙂 ), I got a nice ciabatta roll and made an Indian spiced garlic butter and was all set to go. The prep time was 5 minutes , the cooking time was 10 minutes….. an easy entertainer recipe !

Here are a few things you will need :

  1. Ciabatta roll (any French or Italian bread will do too) – 1 loaf
  2. Butter (or butter substitute) – 1/2 stick or 2 oz or about 50 gm
  3. Oil – 2 tbsp
  4. Garlic cloves – about 8
  5. Chopped Cilantro – 2 tbsp ( use parsley instead)
  6. red chilli powder – 1.5 tsp
  7. garam masala – 1.5 tsp

Image

  • Slice garlic cloves into thin chips. You can also finely mince garlic. But I like nibbling on the crispy garlic flakes at the end.
  • Heat oil in a pan and saute garlic and cilantro , just for a few seconds.

Image

  • Make sure the butter is at room temperature and soft. Add the hot oil with garlic and cilantro to the butter. And also add chilli powder and garam masala to the butter. The hot oil will melt the butter slightly, which is okay. If you used unsalted butter, you might have to add just a pinch of salt to the mix.

Image

  • Slit the ciabatta into halves.

Image

  • Spread the garlic butter on the halves. And make sure the garlic flakes are uniformly spread.

Image

  • Bake at 350 degrees for 10 minutes. I pulled them out after 10 minutes and sprinkled some parmesan just on kids’ portion and returned to the oven and baked at 425 degrees for  another 3 minutes.

Image

The toasted garlic chips easily fall off the bread, so you don’t have to console a panicky child screaming “why do you have to put those awful garlic stuff on my garlic bread ??? ” (Experience !!! )

Slice and serve while the warm aroma fills your home and your soul 🙂

Image

I paired it with a clear soup to help keep the total calories in check and it was a good combo too 🙂

Image

Please let me know what spices you would like to have on your garlic bread, I will try it the next time !!!