Podimas (with green plantains)


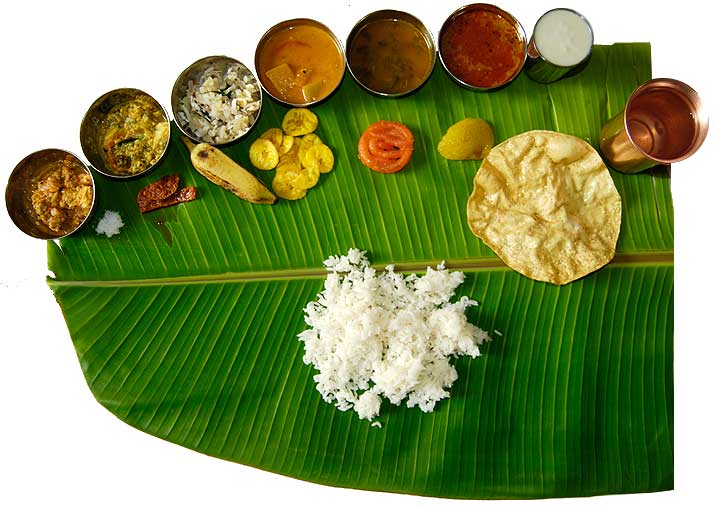
Every state in India has its own version of thali meal. A thali meal is a complete meal with many components, including rice, lentils, curries, soups, stir fries, deep fried sides, desserts and pickles. Tamilnadu’s meal looks something like this :

Image

Picture Courtesy : http://boffinnews.blogspot.com/2012/02/tamilnadu-special-foods-meals-special.html

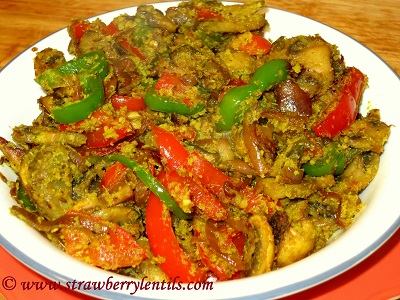
The thali meal cooked at homes on regular days usually has 2 or 3 vegetable sides and on special days the meal is prepared with 4 or 5 vegetable sides and the wedding thali meals come with about 7 or 8 sides. Bigger the occasion, more the number of sides. The beauty of the meal is that each side is cooked by a different method of cooking.  There are thorans (stir fries), koottu (vegetables cooked with lentils), varuvals (vegetables shallow or deep fried with jacked up spices), aviyal (a wet mix of a combination of vegetables cooked in a yogurt and coconut base) and then the podimas or puttu (steamed and shredded vegetables with coconut seasoning).

Here is the method of preparation for podimas (which is also called as ‘puttu’ sometimes). I have used raw plantains for this recipe, this can also be done with potatoes or carrots or yam. This is a very simple recipe, but the trick is to get the texture right.

  • I am using “naattu vazhakkai”, the unripened plantains that we get in Indian stores. Any green plantain can be used.

Image

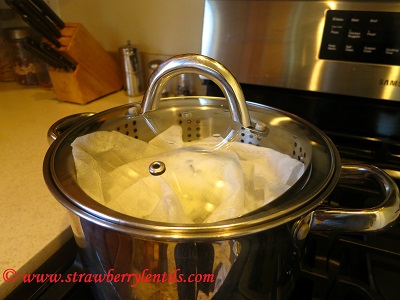
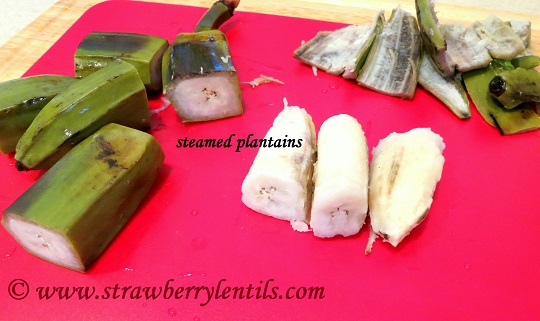
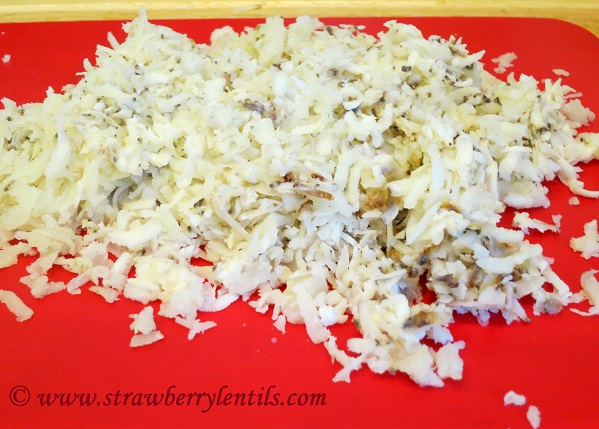
  • Steam the plantains with their skin on, either in a steam basket or in an idli maker. You can also drop them in boiling water and cook for 5 minutes. If the plantains are overcooked, the dish wont turn out that great. Once the plantains are steamed , allow them to cool down completely , peel off their skins and grate them. If you are using potatoes, shred the steamed potatoes with hands instead of grating, and avoid using the potato masher.

Image

Image

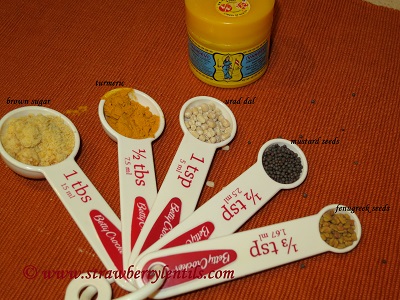
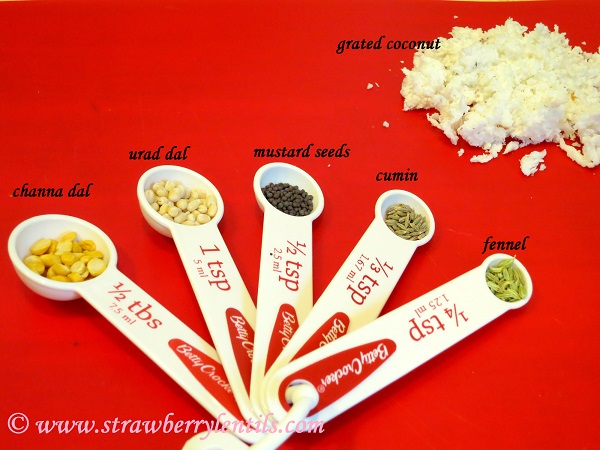
  • For seasoning , you’ll need :
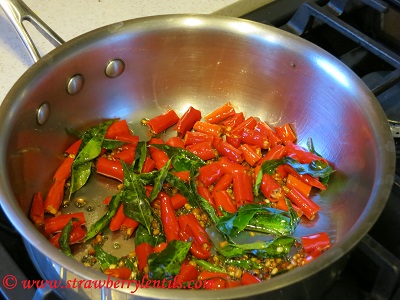
  1. Mustard seeds – 1 tsp
  2. Urad dal – 1 tsp
  3. channa dal – 1 tsp
  4. cumin – 1 tsp
  5. fennel – 1 tsp (optional)
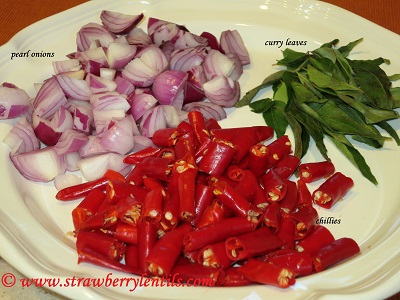
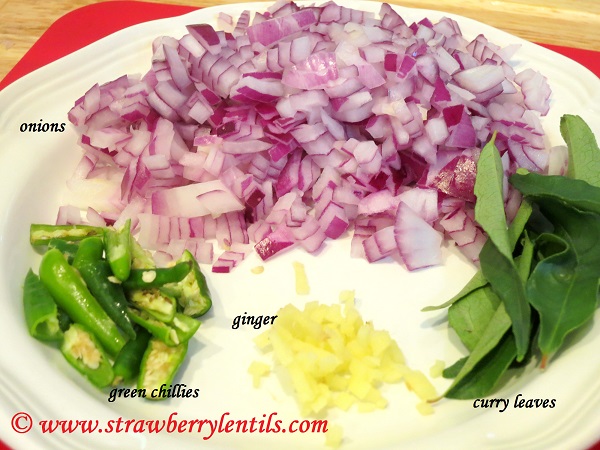
  6. onions – 1 medium , chopped
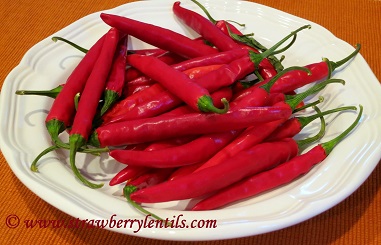
  7. green chillies – 4 or 5 (use red pepper flakes instead)
  8. minced ginger – 2 tsp
  9. curry leaves – few
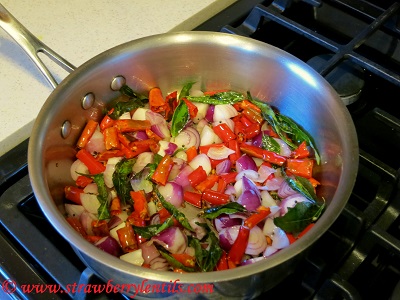
  10. grated coconut – 3 tbsp

Image

Image

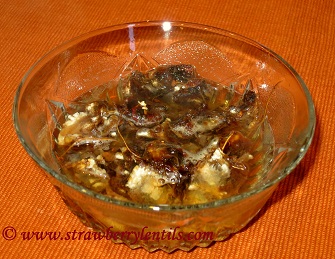
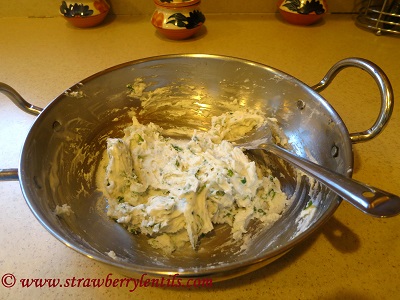
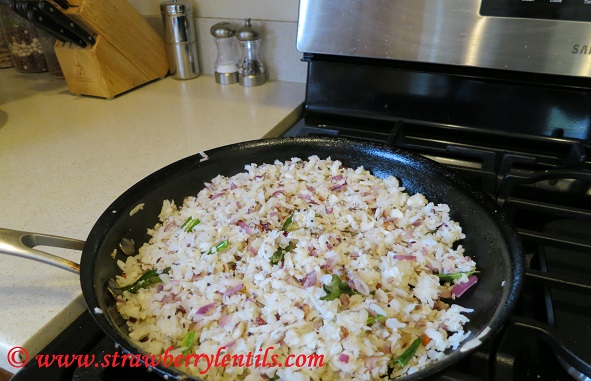
  • In a pan, heat 2 tbsp of oil and splutter the mustard seeds, fry channa dal and urad dal to golden, fry the cumin and fennel. Saute the ginger, onions, green chillies and curry leaves.

Image

  • Once the onions brown lightly, add the grated coconut, toast for a few seconds and turn off the heat.

Image

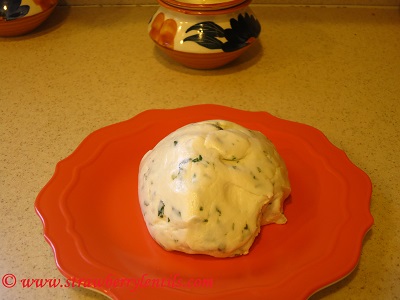
  • Add the grated plantains to the pan and mix gently with the seasoning. Make sure the heat is off while you are doing this. The shredded plantains are delicate as they are already steamed, continuing to heat or going hard with the spatuala can easily mush them. This is the most important step in the recipe. Gently mix everything together, and then turn the heat back on to warm the podimas.

Image

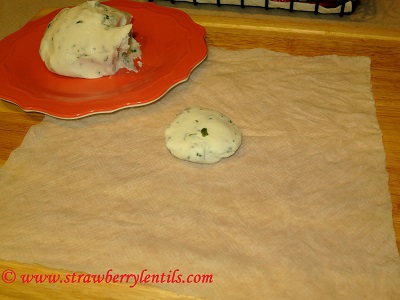
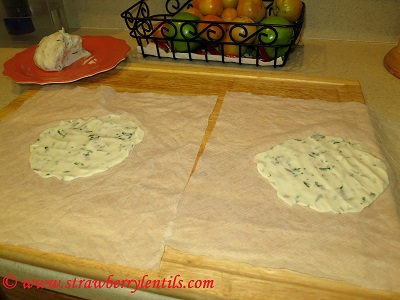
And now your podimas is ready to be served as a side to rice and curry. This goes well with any curry like sambar or rasam , but my favorite way to serve this is to pair up

with super spicy curries like vattha kuzhambu, kara kuzhambu or pulusu.

As I said already, this is just a method pf preparation, try to cook your favorite vegetables this way and let me know how it goes 🙂

Image

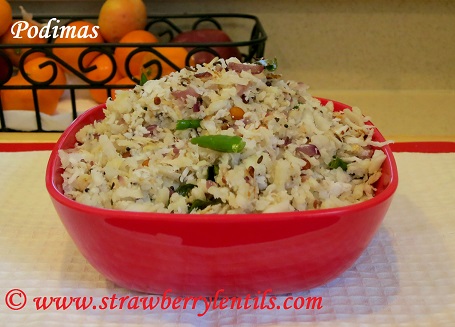
This is a very mild side. If you are looking for a spicy plantain recipe check out Spicy Plantains.

Guacamole


Image

There are countless Indian movies with story lines in which boy meets girl, girl hates boy, boy tries to woo the girl over and over and finally the girl falls head over heels for the boy and they live happily ever after 🙂 . Happened in my life too, except that the boy was the sexy green avocado. Long long ago, so long ago after listening to so many stories about the awesomeness of guacamole, finally came the day when I could actually taste it.  “Disappointment” doesn’t begin to describe how I felt that day. All I tasted was the avocado baby food, completely mashed with no identifiable flavors, I kept searching for some acid to cut the creaminess but in vain. I couldn’t help but wonder if there is something wrong with my taste buds as I was unable to appreciate this widely popular dip. I was cautiously staying away from it for a long time. But luckily it was one of those “first day, worst day” kind of deals. Since then, every guacamole I tasted has been better than its previous version. Over time I figured out the DNA for a good guacamole : chunky texture, lots of acid, spicy kicks and crunchy onions , and most of all, keeping it pure and not contaminating with sour cream and similar stuff.

I am always looking for new guacamole recipes and the latest one I tried was Alton Brown’s recipe. The cumin made me curious, I tried it , loved it and here it is 🙂

  • To add to the avocados , you’ll need :
  1. Red onions – 1 medium, finely chopped
  2. Plum tomatoes – 2 medium
  3. green chillies – 2, finely chopped
  4. Jalapeno – 1 , cut thin
  5. Lime – 1 (more if you like more acid)
  6. minced garlic – 2 tsp
  7. chopped cilantro

Image

  • The above quantities are for two ripe avocados. Scoop out the flesh of two ripe avocados.  Add the juice of 1 lime. Crush 2 tsp of black pepper and 1/2 tsp of cumin and 1/2 tsp of fennel (fennel is my two cents 🙂 ) and add to the avocados and also add salt.

Image

  • Gently mash the avocados with a fork (no baby food 🙂 ) and add the other ingredients to the avocados. Gently mix and adjust salt and pepper to taste.

Image

Thus, the guacamole I couldn’t stand once became my favorite dip for chips. I find tomato salsa to be too acidic , while guacamole offers the perfect balance of acid and creaminess.

Image

Wondering how you can use the familiar guacamole in a novel way ??  Check out MyFoodTapestry’s yummy guacamole sandwiches 🙂 .

Vermicelli Upma (A lazy day meal :) )


I am sure you have days when you don’t want to do much of anything. Just a “take it easy”, “keep it simple” kind of  day.  I am sure you have an arsenal of quick recipes to survive such days…. you can add this one to that list too 🙂

If you have tried vermicelli before and have hated it, it is highly likely that you didn’t like the texture. Vermicelli is very unforgiving when it is overcooked. Al dente is a must, else it becomes gummy and not very appealing. Hope this quick recipe helps you to fall in love with vermicelli.

  • I am using roasted vermicelli – 1 cup. If you have only  the plain vermicelli, all you have to do is heat a tsp of oil in the skillet and toss the vermicelli in the oil for a minute in low heat, until it becomes golden brown.

Image

  • Veggies that you’ll need :
  1. onions – 1 small or half medium (sliced thin)
  2. carrots + green beans (french cut) + green peas – 1 cup
  3. minced ginger – 1 tsp
  4. chopped cilantro
  5. grated coconut – 2 tbsp
  6. lime juice – 1 tsp (optional)
  7. slit green chilles – 3 or 4  (replace with red pepper flakes)

Image

  • In a pot, heat a spoon of oil, and fry seasoning of your preference. I fried mustard seeds and urad dhal as I like the nutty flavors they bring. You can use cumin instead or garam masala (cloves, cinnamon and cardamon). Then saute the onions until translucent, and then the green chillies and ginger and the finally add the carrots, beans and peas. Add salt to sweat the veggies.

Image

  • When the vegetables soften, add 1.5 cups of water to the pot.  [ 1 cup of vermicelli : 1.5 cups of water] Usually the package says to add 2 cups of water, but 1.5 cups of water gives the right texture. Add salt to the water as needed and bring the water to boil.

Image

  • Add the roasted vermicelli to the boiling water and keep stirring. Reduce heat to medium.

Image

  • I timed it and it took exactly 3 minutes to cook 🙂 .

Image

  • Turn off the heat and add the chopped cilantro and grated coconut. You can add a tsp of lime juice for acid but its optional.

Image

And its done. The most time you will spend is in cutting vegetables, if you had pre-cut frozen vegetables , this becomes even quicker.

Image

Some variations :

1. You can add garam masala, ginger garlic paste and mint leaves to make it into vermicelli pulav

2. You can add shredded cabbage, soy sauce and green chilli sauce and make a chinese version of this.

3. You can add turmeric powder and lemon juice.

4. If you choose to add tomatoes, reduce the amount of water.

5. You can add toasted cashews or peanuts.

Puli Molaga (Hot chillies in tamarind sauce)


Image

These beautiful red chillies came from my neighbor’s garden (She generously supplies her garden veggies throughout summer).  So gorgeous….so hot 🙂 I love adding them in all my cooking from upma to fried rice.  A few days back my neighbor’s son walked in with the handful of these and said ” I want you to have this, they are special because these are the last chillies in the plant”. Thank God for these beautiful children filled up with so much love 🙂 I promised him I will make something special with his special chillies.

Puli Molaga is a simple side made by cooking the chillies in  tamarind sauce. You can think of it as the south Indian salsa and it is a multi purpose side that can be served with rice, rotis, idli/dosa or as a spread for breads and wraps.

  • You will need a cup of pearl onions. If they are smaller in size , you can add them as whole. The pearl onions I had were bigger in size, so I quartered them. Cut the chillies in half inch pieces. You will also need some curry leaves.

Image

  • For seasoning , you will need :
  1. Mustard seeds
  2. Urad dal
  3. fenugreek seeds
  4. turmeric powder
  5. jaggery / vellam / brown sugar
  6. Asafoetida / hing

Image

  • Soak tamarind in water. The longer you soak , the more you can get out of the tamarind. Ideally, you soak it for a couple of hours before you need it. I almost always forget to do that, so I just soak the tamarind in water and heat in the microwave for 45 seconds. This softens the tamarind and makes it easier to get the juice out.

Image

  • Dilute the tamarind juice with water. It is hard to correctly predict how much “puli” (tamarind) you will need. I always try to make more than enough and store the rest in the fridge and try to use it within a couple of days.

Image

  • Heat 2 tbsp of oil in a pan.  Fry the mustard seeds. Once they splutter, add the urad dal. When the dal turns to golden brown, add the fenugreek. Then fry the curry leaves and the chillies.

Image

  • Saute the pearl onions.  You can use shallots instead of pearl onions too.

Image

  • When the onions soften , pour in the tamarind juice.

Image

  • Add salt, turmeric, asafoetida and jaggery (brown sugar) to the curry. Adjust salt and brown sugar accordingly so that there is a perfect balance of heat, sweet, sour and salt.

Image

  • Allow the curry to boil and reduce. Do not cover with lid. Any time you need to boil tamarind solution (for any recipe) you should not cover the pan with lid.

Image

  • Cook until the curry thickens and the oil separates.

Image

As I mentioned earlier, this can be served with steamed rice, breads, rotis and wraps. My favorite part of this dish is the onions, soft and juicy soaked in all the spices…..I just keep digging for them 🙂

Image

Adukku pathiri ( with veggie filling)


Image

This is a Kerala recipe, Malabar to be precise. Pathiri is a pancake(steamed) made with roasted rice flour. “Adukku” means layers. The rice pancakes are layered with some filling (usually meat or sweet) in between them. I  made a veggie filling with my favorite vegetables and the typical kerala coconut seasoning. May seem like a lot of steps, but quite simple to make.

  • To make the filling :
  1. Red onions
  2. Green peppers
  3. Red peppers
  4. Mushrooms

(These are the veggies I am using (my favorite pizza toppings 😉 ). You can use any vegetables of your choice. Cut the vegetables thin.

Image

  • Heat a tsp f oil in a skillet and saute the onions and peppers.

Image

  • Add the mushrooms. Add salt and pepper.

Image

  • While the mushrooms are cooking , you can make the seasoning. You’ll need :
  1. grated coconut : 2 tbsp
  2. cumin : 1tsp
  3. green chillies : 3 or 4
  4. ginger
  5. a pinch of turmeric powder

Image

  • Grind the above ingredients without adding water. Grind them just enough that everything blends, no need to make a fine paste. This is the standard seasoning used in Kerala for the vegetable stir-fry (thoran). It is simple but fresh.

Image

  • Add the seasoning to the sauteed vegetables and cook for a minute.

Image

  • This concludes the making of the filling. This, in itself,  is a good vegetarian side.

Image

  • Now to make the pathiris (pancakes), you will need the roasted rice flour. This should be available in Indian grocery stores in some version. Pathiri powder, Idiappam powder, Appam powder, puttu powder…..any of these can be used. If you can’t find it, just regular rice flour will work too, though there will be a slight difference in the softness of the pancakes.

Image

  • To a cup of roasted rice flour, add salt, a tsp of oil and some chopped cilantro.

Image

  • Boil water in a sauce pan, and pour the boiling water to the flour.

Image

  • Pour enough water to wet all the flour and mix with a spoon (as it will be too hot to touch).

Image

  • After a couple of minutes, when your hands can bear the heat, knead it to a smooth dough. Rubbing oil in your palms makes it easier.

Image

  • Okay….now for the fun part 🙂 Traditionally this is done using banana leaves. If you are not lucky enough to get one in your place (like me), here is an easier alternative I learned from a friend. (Trust me, this is much easier than using aluminium foil or plastic sheet).  Wet a paper towel (bounty or brawny, something that won’t collapse when wet).

Image

  •  Place a small ball of dough on the wet paper towel and spread it with your fingers. Make two pathiris.

Image

  • Place the filling on one of the pancakes.

Image

  • Now place the other pancake over the filling. This can be easily done by flipping the other pancake along with the paper towel over the filling and then peel off the paper towel.

Image

  • Press down the edges to seal.

Image

  • To steam the pathiri, I used my steam basket. You can also do it in your idli/idiappam maker.  Place the filled pathiri along with its paper towel in the steam basket.

Image

  • You can also cover the top with another wet paper towel. Steam for 5-7 minutes.

Image

  • And thats it….. 🙂

Image

  • All there is left to do is , slice and serve 🙂

Image

  • This one is done with 4 layers. The procedure is same though, may be a few extra minutes of steaming to ensure the inner pancakes are cooked through.

Image

This post is a dedication to all my friends from Kerala who through the years have shared their language, food ,culture and above all , their love with me.  Wishing everyone a happy Onam and a prosperous year ahead  🙂